Yamaha FZ1 HID Projector upgrade
To upgrade a conventional H4 halogen headlight to HID, you will typically need a bi-xenon upgrade kit. The H4 bulb has two filaments, one for low beam and one for high beam. A bi-xenon headlight uses a single xenon bulb with a mechanism to reposition the bulb in the reflector to provide a low beam or high beam pattern.
There are at least two proper ways to achieve this. Both use a single HID bulb that provides low beam or high beam under control by an electromagnet. Avoid the upgrade kits (usually advertised as high/low beam kits) that have one HID bulb for low beam (that also stays on in high beam), and a regular halogen bulb just for high beam. Stay away from those, they cost as much as the bi-xenon but only provide HID light in the low beam area in front of the bike while still providing significant leakage in low beam, meaning drivers coming in the other lane may be blinded, will flicker their high beams at you and may even crash in you! See this page for a picture of hi/low system: http://www.xenonhids.com/bulb-types.html
The more common type of bi-xenon kit, at least the most commonly found on eBay or Amazon (like used as OEM equipment on most cars) uses a small metal vane rotated by an electromagnet to block part of the beam in low beam mode. In high beam mode, the flag rotates out of the way and all the light goes out. This type of kit requires a significant modification of the headlight assembly because the solenoid activated vane is part of a projector assembly that goes inside the headlight which has the be opened up. However, they tend to provide a very good, broad pattern because the projector is well mated to the HID bulb and takes advantage of the high light output and spreads it wide. This is very comparable to an OEM HID setup like my wife has on her Infinity. They do look a little funny because the projector is much smaller than the reflector, which is not illuminated.
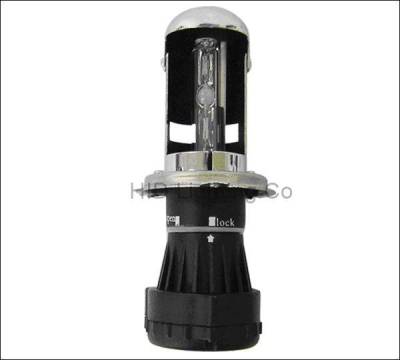
The type I am using (Innovited 55W bi-xenon HID conversion kit) also uses a single bulb but does not rely on a separate projector assembly, they mount directly inside the existing reflector, replacing the H4 bulb. The low beam/high beam selection is done by moving the bulb horizontally. This is done by an electromagnet installed in the lamp holder. This system does not require modification of the headlight, you simply replace the H4 bulb with the HID bulb holder. They use the existing reflector which tends to focus the light more into a spot instead of a broad pattern because the existing reflector is designed for halogen bulbs that are not nearly as bright as HID bulbs, therefore the light from an H4 bulb has to be more focused to be effective.
Here is the type of bulb I use, commonly referred to as the “telescopic” type:
http://www.amazon.com/gp/product/B00BLGC04G?psc=1&redirect=true&ref_=oh_aui_detailpage_o04_s00
The Innovited kit I bought is rated 55 W. The brightness is unbelievable. This particular model has a 6000K color temperature rating, which is called “crystal white” but is very slightly blueish compared to the typical OEM HID projector you are most likely to see on the road. I would have preferred the 5000K which is called “pure white” and even brighter. In addition, the 5000K color temperature is more effective (less attenuation through the air, particularly when it's foggy). Most OEM HID lights have color temperatures between 4300K and 5000K, because it is a pleasing white with good color rendering and has the best range in the fog.
If you ride at night, or even if you don't, I recommend installing HID lights on your vehicle. The difference is striking.
Since most HID systems are intended for automobile use, you may have to work to optimize the wiring so that you do not have excessive wire looms behind the fairing. I had to cut a good bit of the wiring that came with my kit since it was intended to be installed in a car with the two headlights separated by several feet. Of course, on motorcycles, the two headlights are close to each other.
Most kits come with 5 main components: two HID bulbs, two inverters (also called ballasts) and a relay harness. The relay harness takes power directly from the battery to eliminate the power loss through the regular wiring. It also controls the high beam/low beam switching.
HID bulbs need an igniter to initiate the discharge. That is usually a separate module that is connected between the ballast and the HID bulb through a short cable. In some systems, the igniter is built-in the ballast itself but that is not very common. Considering that the igniter has to develop over 20kV while the ballast itself only has to develop 80V or so, it is probably best for reliability to keep the igniter separate from the ballast.
Inverters can vary in size and most certainly in reliability. I have read of complaints about poor reliability on forums and on Amazon's user feedback. Shop wisely to limit potential problems down the road.
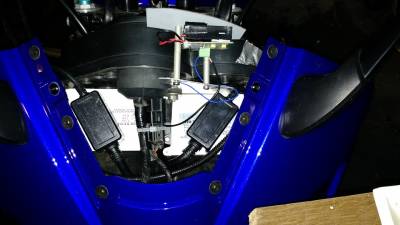
I installed the inverters behind the instrument panel under the fairing, so they are well supported and completely out of the way. The ballasts are the white modules, the black modules on top of the ballasts are the igniters.
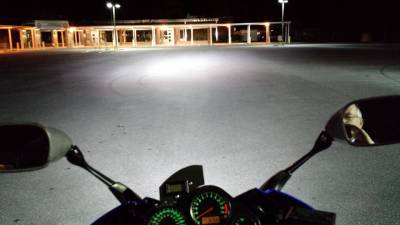
Here is the low beam pattern. Notice that the building does not get light, indicating the HID pattern should not blind incoming drivers:
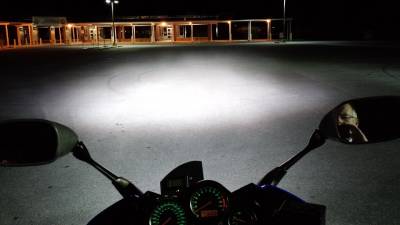
And the high beam pattern. Notice the brightest spot is on the ground in front of the bike, yet the building is also lit up to the point where the HID light swamps the building lights:
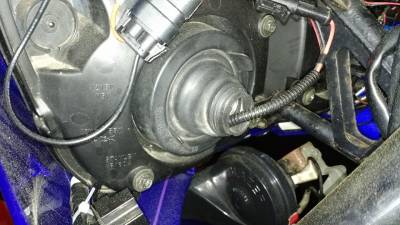
It was a little harder to put the rubber boots back but it does fit if you pull the center part out:
Startup interlock
This motorcycle, like many others of that period (and even many more recent ones), have the headlights running as soon as the ignition key is turned on. These particular 55W ballasts draw about 16A (both of them together, or 8A per ballast) when the bulb is cold, right after turning on the ignition. The current drops down to and stabilizes about 11A after about 20 seconds. This worries me for three reasons. One is that the headlights are powered while the starter is running, needlessly increasing the drain on the small battery. As long as the engine starts immediately, there is no real issue. However in cold weather or if the bike has not been used for a while and the battery is not 100% charged, the engine may not start immediately and the increased drain on the battery due to the headlights may kill the battery before the engine starts. Two, if I am working on the bike and I need the ignition turned on but the engine off, the headlight current will drain the battery down in a hurry. Three, as the battery voltage drops quite a bit when cranking, the HID ballasts flicker during cranking. Not only it is unsightly, it cannot be good for the ballasts or the bulbs.
I am reluctant to add a separate switch to turn the headlights on and off as there is not a good location on the handlebar for such a switch, and putting a switch anywhere else would be inconvenient.
I have seen on the Goldwing forum that some people have been using the oil pressure switch to drive a relay that turns on the headlights. This is very smart but does not work on the FZ1 because it does not have an oil pressure switch, it has an oil level indicator which will give a reading even if the engine is not running. I suppose a simple circuit could take the tach input and turn on the headlights once the engine has reached a certain RPM and keep them on until the ignition is turned off, but that seems more complicated than necessary.
I found a special harness like this: https://www.fasteddysports.com/products-page/?product_id=882 which works as follows: set the headlight switch in the low beam position; turn the ignition key on (headlights are off); start the engine and let it warm up a little, then flick the headlight switch to high beam. The headlights turn on and from there, you can alternate between low beam and high beam normally, until the ignition key is turned off.
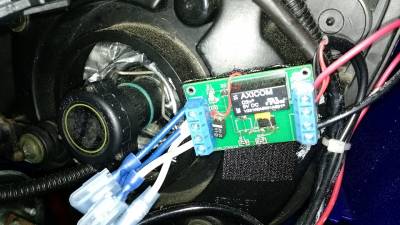
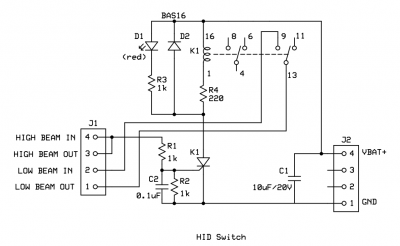
I have designed a similar circuit for my bike. It only requires a relay, a SCR and a handful of passive components.
Here is the schematic:
Note: the terminal referenced as “+VBat” in fact should be connected to the switched 12V, otherwise the circuit will draw current all the time and it would never turn off. I took power from the unused “running lights” harness in the fairing.
